Showing posts with label Hybrid. Show all posts

Sunday, February 5, 2012

Three Hybrid Projects using You and I

Hello! Pene here with some hybrid goodness for you! Litabells Designs is the featured designer at Scrap Orchard this month! This gorgeous freebie called You and I is given out when you sign up for the Scrap Orchard newsletter.


Valentine's Day is of course in February, and I was feeling the love! So I decided to make some hybrid projects with this love-ly kit!

The first is a simple card I made for my husband for our wedding anniversary.  We celebrated our 12th wedding anniversary on the 30th of January!  I made the card in Photoshop Elements, printed it on white cardstock, cut it out with a paper trimmer, and there you have it.  For some extra pop I printed out the heart and stuck it on the card with foam tape.


As you know I am a big fan of Pinterest.  I found lots of gorgeous hanging hearts and garlands and as I couldn't decided which one to make, I made them both!

This is a hanging heart.  I used the heart element in the You and I kit, resized and with various papers from the kit clipped to it.  I printed these on white cardstock, cut them out and folded them in half.  Then I stuck one side of the first heart to one side of the next heart and so on.  I punched a hole in the top with my crop-o-dile and used some twine to hang it.  I added some buttons and beads to the twine for some pretties.

Sorry the photos are a little blurry - it didn't want to stop spinning!

Next is the heart garland.  I have a hall stand with a beautiful glass vase with blue stones at the bottom and white twigs sticking out of it.  I have decorated the twigs a few different ways over the years depending on the season or the event, and of course I had to choose hearts for this month!

For this project, I printed various patterned papers from the You and I kit onto white cardstock and used a heart punch to punch out lots of hearts. I used some linen thread and sewed the hearts on with a needle, alternating buttons and beads in between.  It looks so sweet wrapped around the twigs! I love it!

Thanks for looking!

Cheers,
Pene


Read more...

Wednesday, January 11, 2012

Hybrid Baby Bodysuit using Flutterby Deux

Hello, Pene here again with a hybrid project I made for my friend's new baby girl.  I have made several of these body suits as they are unique and personalised, look great and are really easy to make!


My friend had a baby girl who she named Ruby, so I wanted something really pretty and girly.  Flutterby Deux is one of my favourite kits and it was perfect for what I wanted.


I measured the bodysuit so the image would fit and made a new blank file in Photoshop Elements at this size.  I then made the image and shadowed it as I would a normal layout.  Before printing to the transfer paper, remember to flip the image, either in Photoshop or using your printer settings so that when you iron it on the piece of fabric it will be the right way.
The transfer paper will have it's own instructions as to how to iron it on your garment.  Basically, once the ink has dried, you cut out as much of the image as you can so you don't get too much of an edge of transfer paper on your garment.  Then using a dry iron, you iron firmly over the image for about 30 secs. Once it is stuck down well, you peel off the backing and you're done!


I also used some papers and elements from the kit to make a matching gift bag and tag:


I hope you have enjoyed this tutorial and it inspires you to get out the transfer paper and decorate some garments!  You are limited only by your imagination!

Cheers,
Pene


Read more...

Saturday, January 7, 2012

Paper Crafts @ Pinterest

Pinterest...one of the best internet sites ever!  Also one of the biggest time suckers ever....

I like browsing for craft ideas and seriously this place is A.M.A.Z.I.N.G!!  Type what you're looking for in the search box, sit back and let your eyes revel in the goodness that unfolds!

I searched 'paper" and this is a small selection of what I found that I've repinned for a rainy day:

This gorgeously simple heart garland made out of a dictionary.  You can find the tutorial here.


I love these inchies!  The colours make me happy and imagine what you could do with this idea! Inchies are 1" x 1" squares made from anything for anything...they could be magnets, made of paper, fabric, glass...the possibilities are endless!  More information on inchies here.


And to finish, check out this amazing site on paper flowers for your wedding!  That bouquet is stunning!!


I hope you feel inspired to create today!

Cheers,
Pene

Read more...

Friday, December 2, 2011

Folded Paper Christmas Tree


Hello and Pene with you again with another hybrid project. I have wanted to make one of these little trees for a while as I think it will look very pretty on my hall stand. It was pretty easy to make but you need a bit of time to do it.  Oh, and my advice would be to use a thimble to push the pins in as my thumb is still sore!!

To make this you need:
  • a polystyrene tree, whatever size you'd like
  • double sided patterned paper - this tree used three A4 sheets
  • 2 stars for the top of the tree
  • paper trimmer
  • distressing ink and sponge
  • straight pins
  • bamboo skewer
  • ribbon, glitter, bling etc from your stash

Print the paper of your choice onto an A4 (or letter sized) piece of cardstock.  I chose three papers from Lita's Christmas Blessing kit, the very merry collab with Captivated Visions available now at Scrap Orchard.


Cut the patterned papers into 1" wide by 3" long strips.  Ink the pieces if desired.

Fold the strip so the ends meet, but don't squash it flat.  Start at the bottom and position the paper so it isn't pushing the tree off the surface.  Push a pin through the paper and into the polystyrene tree. Continue right around the tree for your first row.

For the next row and each subsequent row, overlap the paper so that it covers the first row of pins and the gaps between each strip.


Keep going until you have covered your tree.  I used extra pins at the top to ensure a smooth finish.


I then printed 2 stars onto white cardstock and cut them out.  I used a pop up glue dot to stick one of the stars to a bamboo skewer.  I then glued the other star and craefully stuck it on the other side of the bamboo skewer to give me a nice double sided star.  I pushed the skewer through the top of the tree.  I used some gold ribbon to hide the gap between the star and the tree.  


You could decorate the tree anyway you like - add some brads or bling or paint it with glue and sprinkle glitter on it.

I hope you have enjoyed this and please link back here if you make a tree!  And if you have any questions, please don't hesitate to ask!

Cheers,
Pene xoxo


Read more...

Wednesday, November 23, 2011

Farmer’s Market is Open

It’s that time of year. It seems like everyone is buzzing around with so much to do in preparation for the approaching holidays. The stores are filled with shoppers that have anxiously waited for the biggest sales of the year. Today is that day… The Farmer’s Market is OPEN and it is filled to the brim with lush goodies ripe for the taking. By ripe I mean perfectly priced to pick! How does $1.00 sound? To me it sounds like a rock bottom price and one that will not last long. Lita has been busy filling the market with some fresh fruit. These prices won’t last long so hurry over to Scrap Orchard and fill up your cart! Here is a taste of what you will find in Litabells store.

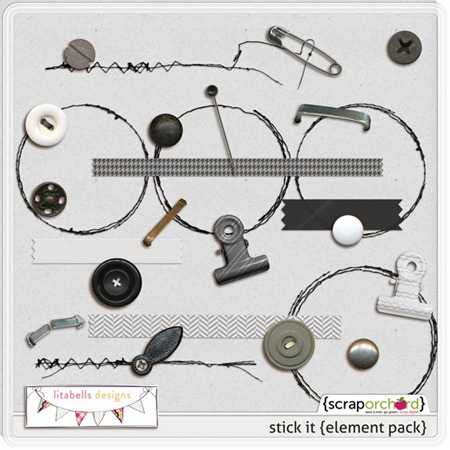
First up is a fantastic set of elements that are a must have for your digi stash. We have all been there… working on a page and the kit we are using doesn’t have a staple or a fastener. Stick It to the rescue. This collection of assorted fasteners will keep your digital goodies from flying off the page.
litabells_stickit

Stamped is a mix of strips and mats that will add a bit of grunge to your next project.
litabells_stampedV1

Also for only $1.00 during the Farmer’s Market sale is the brand new Thankful For You. This mini kit makes a great first impression with the fantastic color palette. Once you look inside you won’t be disappointed with all that it has to offer.
litabells_thankfulforyou

For those days that you are not feeling particularly inspired to scrap, turn to Duets Volume 3 and lend your creativity a hand.
litabells_duetsV3

Newsworthy - A vintage newspaper alpha a perfect finishing touch for your next project.
lbd_FMnewsworthy

This hybrid Chore Chart will make creating a chore chart a breeze. It includes a customizable sticker sheet.
lbd_chorechart

Lita’s Belles has been burning the midnight oil to bring you a ton of inspiration.
jan_duetsv3_happyplace athena_duetsv3_stamped_attitudedi_duetsv3_stamped_everydayvicky_Stickitthankful_jan thankful_dichart_heather1 chart_dude_heather
Thank you so much for stopping by the blog today. Now go forth and scrap!

Read more...

Thursday, November 3, 2011

Hybrid Tutorial - Post It Note holders

Post It Note Holders

Hello!  I’m Pene and today I’d like to show you a great little tutorial for a
last minute, quick, easy and beautiful gift.  In about 10 minutes, and with only a few supplies, you will have a fabulous Post It Note Holder.


Supplies:
·      Cardstock
·      Paper Trimmer
·      Scissors
·      Scorer
·      Ruler
·      Distressing ink and sponge
·      Double sided tape
·      Foam tape/Dimensionals
·      Flowers, ribbon, bling – whatever tickles your fancy from your stash
·      Digital Kit -  I used Where I Stand by Litabells Designs, available at Scrap Orchard.

Step One.
I created an A4 sized document in Photoshop Elements 6.0 and made a rectangle using the Rectangle Tool measuring 17cms wide and 8cms tall.  I clipped the blue spotted patterned paper to this rectangle to make the background piece for the holder.  I also made a square measuring 7.5cms x 7.5cms for the front of the holder, and clipped the aqua paper to it.  Using the 7.5cm x 7.5cm square, I resized a wordstrip, tag and flower elements from the kit to embellish the front of the holder.  I then printed this on A4 white cardstock.  To continue the patterned paper inside the holder as well, I turned my cardstock over and printed the cross hatched pattern paper, giving me a perfectly matched double sided piece of cardstock for the holder.


Step Two.
Using a paper trimmer, I cut out the rectangle and square pieces of cardstock, and using scissors, then cut out the wordstrip, flowers and tag.  I used a sponge and distressing ink to ink all the edges of all the pieces, as this gives a better looking edge than plain white and adds some depth.  I used Tim Holtz Distress Ink in Brown Corduroy. 


Step Three.
Taking the rectangle of cardstock, use your ruler to measure 8cms in from the left, mark and score.  Do the same from the right, leaving you a spine 1cm wide.  I used a piece of ribbon measuring 50cms to close the holder. Depending if you want to tie a bow, or a knot, vary this length accordingly.  Use double sided tape to stick the ribbon across the whole rectangle piece, leaving the ends free to be tied.


Step Four.
Using double sided tape, I stuck the square of aqua patterned paper to the front of the holder. I used some twine to attach the tag to the flower, punching a small hole for the twine to pass through.  I left the twine longer at the ends and then trimmed it to size so it peeked out from the top of the flower. I used doublesided tape to stick down the wordstrip, and dimensionals to stick the flower elements on for a bit of pop.  You could use anything in your stash to decorate the front; bling, buttons, glitter etc.


Step Seven.
The last step is to stick half a pad of post it notes to the inside of the holder, then tie the ribbon to close it.


So there you have it, a quick and easy project with a stunning result!

Cheers,
Pene

Read more...